Step-By-Step DIY Boutonnieres for the Groom and Groomsmen
Jan 05, 2026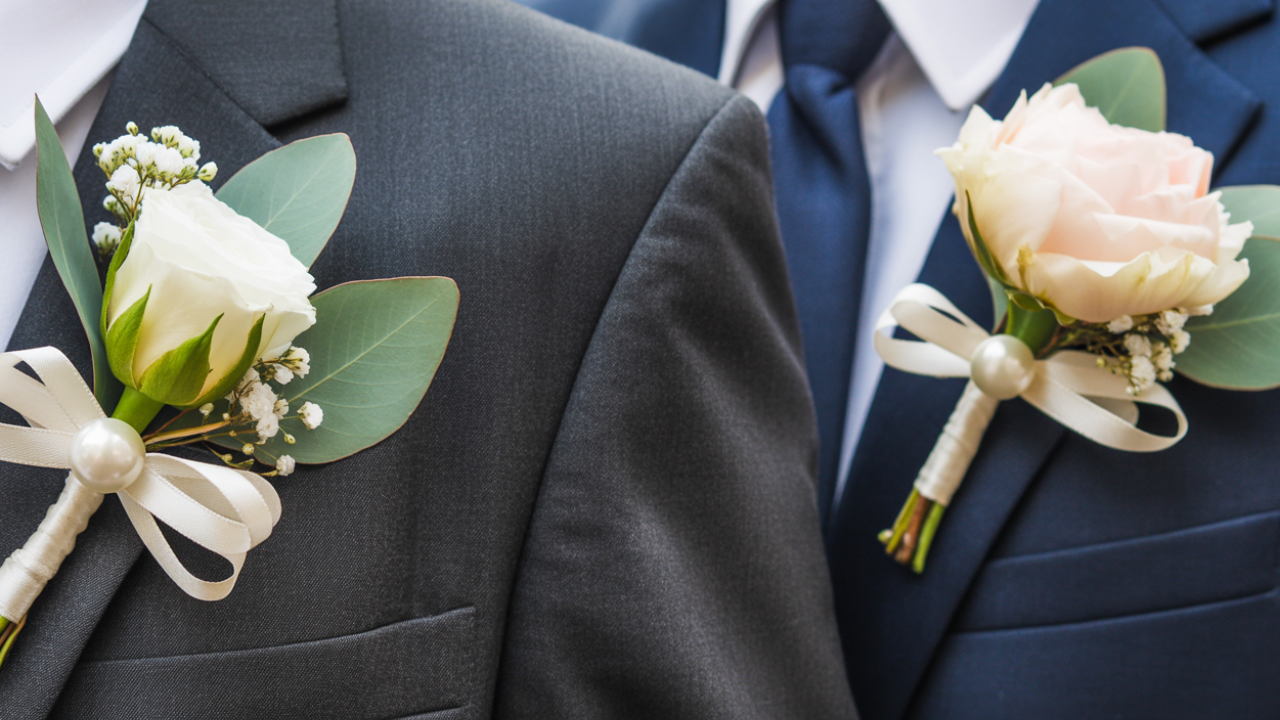
Disclosure: This post may contain affiliate links and advertisements. I may earn a commission at no additional cost to you. Content is supported with Ai and is for entertainment purposes only.
Make the Most of One of the Few Times Men Tend to Wear Flowers!
There are so many wedding details, but boutonnieres hold a special kind of quiet significance. They’re subtle, symbolic, and one of the few moments when men get to wear flowers — which makes them feel both meaningful and memorable. I’ve always loved that contrast. Something soft and organic paired with a tailored suit feels intentional and grounding.
DIY boutonnieres are one of those projects that feel small until you’re holding them in your hands. Suddenly, they matter. They become keepsakes. And they give you the chance to personalize the wedding day in a way that doesn’t feel overdone or flashy — just thoughtful.
Whether you’re crafting boutonnieres for the groom, groomsmen, or special family members, this guide walks you through beautiful ideas, practical tips, in-depth steps, common mistakes to avoid, and meaningful ways to surprise the guys with something made just for them.
🌿 Beautiful Boutonniere Ideas & Styling Tips That Actually Work
Boutonnieres don’t need to be complicated to be stunning. In fact, the best ones usually aren’t. Clean lines, intentional color choices, and scale matter more than elaborate florals.
Popular Boutonniere Styles
• Single bloom (rose, ranunculus, carnation)
• Greenery-forward (olive, eucalyptus, fern)
• Dried florals for longevity and texture
• Minimalist floral + accent (flower + berry or bud)
• Seasonal stems pulled from the wedding palette
I’ve found that men tend to appreciate boutonnieres that feel structured and unfussy. If it looks sturdy and well-balanced, they’re more likely to actually enjoy wearing it.
Color & Size Tips
• Keep boutonnières smaller than corsages
• Choose colors that complement the suit, not compete
• Avoid overly fragrant flowers
• Keep the shape vertical for a clean lapel line
A groom’s boutonniere can be slightly more detailed — an extra accent, a different flower, or a subtle wrap — while keeping the groomsmen cohesive.
Helpful product:
Floral Tape and Wire Set — This is ideal for DIY boutonniere projects because it keeps stems secure and polished without adding bulk, making it beginner-friendly and reliable.
❓ Boutonniere FAQ + Common Mistakes (and How to Avoid Them)
Before jumping into the DIY process, it helps to know what not to do. Most boutonniere mishaps are completely avoidable with a little planning. Be sure to try Boutonniere Pins (pearl or flat head) — These are perfect for weddings because they’re discreet, secure, and easy for a best man or coordinator to pin quickly.
Common Questions
How far in advance can I make boutonnieres?
Fresh florals: 24–48 hours
Dried or faux: weeks in advance
Should the groom’s boutonniere match exactly?
They should booth coordinate, but not be the same. A small distinction feels intentional, and you want your groom to shine!
Do boutonnieres need pins?
Yes — magnets are optional but pins are more universally reliable. I personally like the boutonniere plastic pocket sleeve holders that hold flowers up with a plastic pocket sleeve. They just seem more safe!
Major Mistakes & How to Fix Them
• Too heavy: Keep materials lightweight so the boutonniere doesn’t pull the lapel
• Too large: Scale down — subtle always photographs better
• Weak attachment: Secure stems tightly and test before the day
• Wrong placement: Boutonnieres sit on the left lapel, above the heart
I always recommend making one practice boutonniere first. It helps you find the right balance before committing to the full set.
✂️ How to Make DIY Boutonnieres (In-Depth Step-by-Step Guide)
This is the heart of the project and the most satisfying part. Set aside a calm afternoon, put on music, and treat this like a creative pause rather than a task.
What You’ll Need
• Fresh, dried, or faux florals
• Greenery or filler
• Floral wire
• Floral tape
• Scissors or wire cutters
• Ribbon or twine (optional)
• Pins
Step-by-Step DIY Boutonniere Instructions
1. Choose your focal flower - Start with the main bloom or greenery. Trim the stem to about 2–3 inches.
2. Add supporting elements - Place greenery or accent stems slightly behind the focal flower to create depth.
3. Secure with floral wire - Wrap wire tightly around the stems just below the bloom heads.
4. Wrap with floral tape - Stretch the tape slightly as you wrap downward to activate the adhesive and create a clean finish.
5. Trim stems evenly - Cut stems to a uniform length for consistency across all boutonnieres.
6. Add optional wrap - Ribbon, twine, or fabric strips can be wrapped around the tape for texture or color.
7. Test the weight and balance - Hold it upright and gently shake — nothing should shift or fall.
8. Store properly
Fresh florals: place in a breathable container in the fridge
Dried/faux: store flat in a box until the wedding day
Lay all the boutonnieres out together once finished. Seeing them side by side is incredibly rewarding. Plus helps you spot any inconsistencies before the big day.
🎁 3 Meaningful Ways to Surprise the Groom & Groomsmen
This is where the emotion comes in. A boutonniere doesn’t have to be handed over casually — it can be part of a moment.
1. A Note Attached on the Morning Of
Add a small tag or card with a sentence like:
• “Thank you for standing with us.”
• “We’re grateful for you today.”
It’s simple, but lands deeply.
2. Private Reveal Before the Ceremony
Have the best man distribute boutonnieres in a quiet moment before photos. It creates a pause and sets the tone for the day.
3. Display Them Like Gifts
Lay boutonnieres on each place setting or hang them on labeled hooks in the getting-ready space. It turns them into keepsakes instead of accessories.
I’ve seen grown men get emotional over this. It’s not about the flower — it’s about being included in something meaningful.
Try Small Gift Tags with String — These work beautifully for adding names or messages without overpowering the boutonniere design.
💍 A Thoughtful Finish to a Meaningful Detail
DIY boutonnieres are one of those wedding details that quietly carry weight. They honor the people standing beside you, add beauty without excess, and mark one of the rare times men get to wear flowers with purpose.
I hope this project feels joyful rather than stressful, and that creating these small pieces becomes part of the memory — not just the checklist. Wishing you a beautiful wedding day, meaningful moments, and the kind of details that feel just right.
Wishing you the best at your beautiful wedding! ✨
Warmly,
Jenna